Friday, August 30, 2013

Auto Running Numbers

Part 4


Setting up the mesh. You need to make a square plane for each digit so if you have a 6 digit running number you need 24 planes. I start with one, make it just a little bit bigger than the number on the skin texture, make 5 copy, and then add the 6 textures(digit_1.tga to digit_6.tga). The UVmap is done by the "from view" option. This should look like the photo in the last post. Note that there is a gap between the squares. After you get a set of 6 made you can copy, move, and size for the other side and the ends.

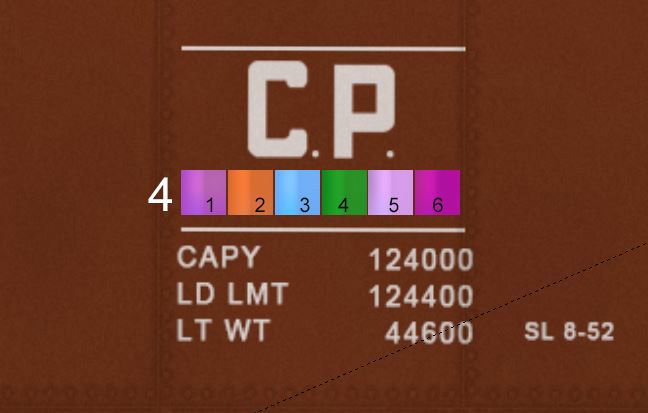
If you need less than 6 digits, you can move them to a new layer. You will always need digit_6 so remove digits from the left to the right, that is digit_1 then digit_2 then digit_3 and so on.

The size of the "digit_n" should be the same as the "alphanumber_n.tga" texture, I use 16x16, 8x8 is to small and 32x32 is only good for large numbers.

Using two or more fonts.

This is done by copying and editing names and textures.

First the "digit_n.tga" is renamed to "digit_na.tga" and a new copy is named "digit_nb.tga" where n is 1 to 6 only. for three fonts you would make 6 more with "digit_nc.tga". You also have to make/edit the .texture.txt files.

In use put all the "a's" as one font and all the "b's" as the other.

Note that the color of the texture is the same for "a" and "b" only the name changes. This is in the Wiki and the old CCG's.

Last is how to change the number font and color. This is the textures in the folder "car_alpha_numbers".  The names are just like the "digit" names, just that "alphanumber" is used for "digit" and you must always have 10 that is "alphanumber_n.tga" where n is 0 to 9.

Color change is done by opening the "alphanumber_n.tga" in Photoshop or what ever you use and change the color but not to a solid one or you get an error from CMP. The ones I use have more than one RGB number. In Photoshop you can use a Variation tool that will change the color from say white to green and remember the RGB change so you can open the next one an apply the same change, saves a lot of time as you have to do this 10 times.

Font change is a bit harder as it is in the alpha channel so you need to know how to edit that in your pant program. If you know how you just change the font. You can some times edit just one number some times if all the other numbers are right. I do this with Arial as the "1" has a serif witch is not right most of the time and simple to fix. Keep track of the size and what the number is, in some of my first ones I had two "4"s and no "5".

Over all look at what others have done.


Monday, August 26, 2013

Auto Running Numbers

Part 3


To explain the Numberit system you have to look at how the mesh part looks, how to make them will be in part 4.


The 6 black numbered squares are the 6 meshes with the 6 digit textures. The number textures replace the digit textures in game only.

For a 6 digit number you need the "numberit_prefix" in the config, if you only need a 1, 2, or 3 digit number you can leave it out.

Set up for 6 digit number:

numberit_prefix      "xxx"  where the XXX can be any number but one that starts with "0"

numberit_min                        "ABC"
numberit_max                        "DEF"


The  number A must be grater than D, B grater than E, and C grater than F. DEF can be as low as "000" but no higher than "888". ABC can be as high as "999" but no lower than "111". This is due to what may be a bug but if you set A and D both to "0" you do not get a "0" you louse a digit and will have a 5 digit number not a 6 digit.

Set up for 5 digit number:

numberit_prefix "xx" where the XX can be any number but one that starts with "0"

numberit_min "ABC"
numberit_max "DEF"


The number A must be grater than D, B grater than E, and C grater than F. DEF can be as low as "000" but no higher than "888". ABC can be as high as "999" but no lower than "111". This is due to what may be a bug but if you set A and D both to "0" you do not get a "0" you louse a digit and will have a 4 digit number not a 5 digit.

Set up for 4 digit number:

numberit_prefix "x" where the X can be any number but one that starts with "0"

numberit_min "ABC"
numberit_max "DEF"


The number A must be grater than D, B grater than E, and C grater than F. DEF can be as low as "000" but no higher than "888". ABC can be as high as "999" but no lower than "111". This is due to what may be a bug but if you set A and D both to "0" you do not get a "0" you louse a digit and will have a 4 digit number not a 3 digit.

Set up for 3 digit number:

numberit_min "ABC"
numberit_max "DEF"


The number A must be grater than D, B grater than E, and C grater than F. DEF can be as low as "000" but no higher than "888". ABC can be as high as "999" but no lower than "111". This is due to what may be a bug but if you set A and D both to "0" you do not get a "0" you louse a digit and will have a 3 digit number not a 2 digit.

Set up for 2 digit number:

numberit_min "AB"
numberit_max "DE"


The number A must be grater than D and B grater than E. DE can be as low as "00" but no higher than "88". AB can be as high as "99" but no lower than "11". This is due to what may be a bug but if you set A and D both to "0" you do not get a "0" you louse a digit and will have a 2 digit number not a 2 digit.

Set up for 1 digit number:

numberit_min "A"
numberit_max "D"


The number A must be grater than D.  D can be as low as "1" but no higher than "8". A can be as high as "9" but no lower than "2". This is due to what may be a bug but if you set A and D both to "0" you do not get a "0" you louse a digit and will not have a number.

If you need an extra digit just put one in as you do lettering. This can come up with some low number of cars say the car numbers are 456000 to 456029 you would have to add in the "4" set the numberit_prefix to "560", the numberit_min to "00", and set numberit_max to "29".


Friday, August 23, 2013

Auto Running Numbers

Part 2


I use NumberIt by Dave Renshaw (Eldavo's Railway Emporium) witch uses the built-in numbering that has always been in Trainz. Two things that it will not do are increase the number of digits and work with something that uses a draw-bar. So you can not have running numbers from 1 to 20 but only 1 to 9 or 10 to 20. The draw-bar is if you have the same running number on a steam engine and tender NumberIt will give the tender a deferent number, same with anything that uses the same KUID two or more times.

I will use one of my cars to show how to set it up, CP boxcar KUID:58422:100333 witch is on the DLS and has a basic set up with all the textures you need.

First thing to start with is a car that is done to the point that you can run it in Trainz and it has all the UV mapping and textures done. This should have a running number with the right number of digits, font, size, and color.

Next I copy over "numberit.gs" to the root folder, this is what makes it work. Copy over the file folder named "car_alpha_numbers" also to the root folder, this is were the numbers 0-9 are. In the folder named "40ft_boxcar_body" copy the 6 textures over named digit_1.tga to digit_6.tga and the 6 .texture.txts named digit_1.texture.txt to digit_6.texture.txt. The names can not be changed.

I normally do the config.txt next, so the following are what I copy and then edit into the config.txt.

script                                  "numberit"
class                                   "xnumberit"
fonts                                   1
fonts-path                              "car"
use-coupler-sounds                      1

The first two line call the script, do not edit until you know how every thing works!

Line 3 is the number of font sets are used, here just 1. If you need two sizes, fonts, or color you have to make a full set of 10 new textures in the "car_alpha_numbers" folder and use the right names.

Line 4 is were the fonts are the path only needs the name before the "_alpha_numbers".

Line 5 has nothing to do with this but is not well known, it adds coupler sounds.

extensions
{
  reportingmark-32711                   "C.P."
  carnumber-32711                       "x"
 
  numberit-75134
  {
    numberit_prefix                     "251"
    numberit_min                        "000"
    numberit_max                        "999"
  }
}


The top part is for CMTM not numberit.
numberit-75134  do not edit.

numberit_prefix   "251"  the "251" can be edited to what you need, this is the first 3 digits and do not change. More in next part.

numberit_min   "000"  can be edited, is the lowest number of the last 3 digits.
numberit_max  "999" can be edited, is the highest number of the last 3 digits.

The above give running number from 251000 to 251999.

kuid-table
{
  numberit_library                      <kuid2:75134:99003:7>


this is what should be in the top of the kuid-table, note you do not need a number for a library.

More on this next post.


Wednesday, August 21, 2013

Auto Running Numbers

Part 1


Railroads by new equipment in lots and give them a set of numbers as the running numbers, this can be as low as one or up to 20,000 or more. Finding out what the set of numbers should be can be hard sometimes.

Locomotive numbers are the hardest ones to find as some numbers were used on more than one locomotive and the railroad shops can make a locomotive look like deferent one. The C. B. & Q. had a 2-4-2 that went into the shop and came out a 4-4-2. I also know of a F7B that was made into a F7A with a full cab but it was 6" shorter.

Passenger cars mostly have names but a lot also have numbers or both.

Everything else has numbers that are not hard to find.

Finding locomotive and passenger car numbers by railroad is best if you can find a roster for the railroad. Passenger car names can be a big mess as a lot of cars had more than one name over time.

This gets us to freight cars witch can be found in the Official Railway Equipment Register this was a book but is now on line. ORER was first published in 1885 and came out weekly. This was used by the railroad to make up trains. What it has is every car used in the U.S., Canada, and Mexico with car numbers, marked capacity, length, dimensions and cubical capacity.

The current one is around $250 but the old printed ones can be found as used books. For use in modeling there was a NMRA reproduction of Vol. LXVIII No.3 January 1953 that can be found. I got one from Amazon and there were 3 or 4 available and runs abot $45. The book looks like the yellow pages has 826 pages.

Wednesday, January 9, 2013

Days 22, 23, and 24

Today I have it done. I finished the normal map, texture, and mesh, did the LOD, tested and made CDPs. I did find a lot of errors is both sets of plans and as Lima only made 22 I have not found any two photos that look the same.

Monday, January 7, 2013

Days 19, 20, 21

The mesh is almost done and the texture. Look for errors and small fixes. Next will be making the normal map.

Thursday, January 3, 2013

Days 16, 17, and 18

Adding more parts and have started on the main texture (not done yet). If you look at the builders plate, the red diamond, I make that in two ways, first I have a large image of the plate in the texture that I copy and make small. The small ones are in the right place on the cab sides and the big one is used to texture a small mesh diamond that is moved to cover over the small ones for the high LOD, this gives you one you can read up close.


Note:the normal map is just a place holder the right size, going back to add a normal map to a material is way to much work.